Give your rig a purpose

a place to discuss anything of interest to owners of M151 jeeps

Moderators: rickf, raymond, Mr. Recovery

Post Reply
User avatar
m3a1
Lt. General
Lt. General
Posts: 4045
Joined: August 7th, 2014, 6:36 pm

Give your rig a purpose

Unread post by m3a1 » June 26th, 2019, 8:22 pm

I fell into this deal which was darned near being given away simply because many of its attendant parts were missing and so, it was an orphan. Unless you're feeling lucky, and/or you are extremely handy these can be had as a complete unit for not too much money. But, I believe it's just one of those things you don't see too often in private hands chiefly because of its rather specialized nature and of course where would you be without a spool of, well, whatever (which you KNOW is going to cost an arm and a leg). Happily, I have a full spool and an empty spool that have been sitting around for ages. These reeling machines are not limited to use strictly to the likes of the Signal Corps. They are also in use with Engineer units and others. In any case, I felt this rig would make for an interesting departure from the usual stuff we find on display.

Image

It wasn't until I ordered up a TM for this that I realized how many things I didn't have! By way of example, I am going to have to make my own axle for the spools. Not the headache you might imagine, but it will be an interesting and challenging little build.

Image

Consider things like these brakes for the spindles. They are really amazing little devices. They can be set to any degree of drag including full brake.

Image

Stay tuned. I will have more to share as I work through this project.

Cheers,
TJ
Last edited by m3a1 on June 28th, 2019, 11:25 am, edited 2 times in total.

User avatar
rickf
General
General
Posts: 19776
Joined: November 26th, 2007, 1:28 pm
Location: Pemberton, NJ.

Re: Give your rig a purpose

Unread post by rickf » June 27th, 2019, 10:50 am

You know................... As much as I hate to give you a fat head, you do some fantastic and detailed restoration work. Have you thought of doing this as a side business for income?
1964 M151A1
1984 M1008
1967 M416
04/1952 M100
12/1952 M100- Departed
AN/TSQ-114A Trailblazer- Gone

User avatar
m3a1
Lt. General
Lt. General
Posts: 4045
Joined: August 7th, 2014, 6:36 pm

Re: Give your rig a purpose

Unread post by m3a1 » June 27th, 2019, 2:21 pm

Nah.. Not really. The moment it becomes like work, I begin to lose interest.

I am actually in a position to buy a large number (if not all) of those handie-talkies but the moment I find myself staring at a large pile of radios needing a makeover I'll also find that I'd rather be sitting down with a cool drink and a long period of watching youtube.

I'm lazy like that...
Last edited by m3a1 on June 28th, 2019, 11:26 am, edited 1 time in total.

User avatar
rickf
General
General
Posts: 19776
Joined: November 26th, 2007, 1:28 pm
Location: Pemberton, NJ.

Re: Give your rig a purpose

Unread post by rickf » June 27th, 2019, 2:53 pm

Yea, But depending on what you have in one of those restored radios I would bet reenactors will be interested in them. Then you could sit there watching You Tube while making money. That is called "Smart lazy". :mrgreen:
1964 M151A1
1984 M1008
1967 M416
04/1952 M100
12/1952 M100- Departed
AN/TSQ-114A Trailblazer- Gone

User avatar
m3a1
Lt. General
Lt. General
Posts: 4045
Joined: August 7th, 2014, 6:36 pm

Re: Give your rig a purpose

Unread post by m3a1 » June 27th, 2019, 8:38 pm

I considered it. Replacement data plates and the antenna/cap combo are very pricey and that's a deal breaker right there.

User avatar
m3a1
Lt. General
Lt. General
Posts: 4045
Joined: August 7th, 2014, 6:36 pm

Re: Give your rig a purpose

Unread post by m3a1 » June 27th, 2019, 10:05 pm

Fabricating the axle for the spools.

So what you're looking at here is really nothing more than a length of 3/4" rod (solid stock) with some 1" square steel tubing slid over it.

The correct axle is a far more grand design with finely machined surfaces that fit very nicely. I have no lathe so making such an item is out of the question. Far easier to make this rudimentary axle and keep my eyes open for a proper one.

There exist at least two types of axle - one is a single drive mechanism (such as you might expect to be employed for one large spool) and another that is a double drive mechanism allowing two spools to be reeled in or out independently of the the other. For double drives, there will be two brakes present (as you see here). I find hints that a third type of axle exists; one that has a smaller diameter and can be used with small spools but I have no image of it.

My current plan is to affix the outer ends of the square steel tubing permanently to the rod. This is where the crank handle and brakes go. The two inner sections (separated by a large washer) will have a hole drilled across their axis, through which a removable pin can be placed to secure it to the rod for reeling and with the pin removed, would allow that section to idle, or free-wheel. It's a Fred Flintstone design but the theory is sound.

The length of the whole axle is purely arbitrary but I felt that it made sense to have sufficient length to be able to get a grip on the thing at either end for lifting it onto the supports. At the end of the day, this is a completely B.S. arrangement, but it will work. I don't intend to do much wire-laying but the amount of additional work necessary to make it actually usable in this way is negligible, so why not?

Image

Unfortunately, this crank handle isn't 100% either. There is a small device between the two upper and lower square drive sockets that acts as a detent. The detent on this one is shot but fortunately, there is a rather nice hole already bored in it, through which a pin can be placed. I've removed the broken detent device so the holes are through and through. So, I will be drilling a hole at either end of the axle to accept a pin that secures the handle. Again, not correct, but ya gotta do what ya gotta do! These crank handles are still in use today so it is not surprising they are hard to find. I am looking for a second handle so if you have one, please let me know!

Image

Here's a nice shot of how the brakes are installed on the reeling machine. To brake momentarily, it is only necessary to push the toggle toward the spool. To set drag, or lock the brake up, simply tighten the wing nut down. Inside this device is a series of simple clutch discs. Pressure placed upon them creates drag.

Image

Cheers,
TJ

User avatar
m3a1
Lt. General
Lt. General
Posts: 4045
Joined: August 7th, 2014, 6:36 pm

Re: Give your rig a purpose

Unread post by m3a1 » June 29th, 2019, 12:49 am

Well, everything was going along well until the project was interrupted by drain. Yes, that's right! A clogged drain and in the kitchen sink, no less. What a headache.

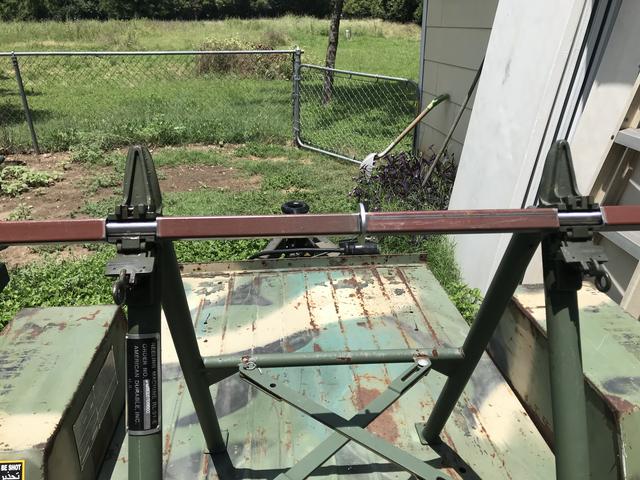
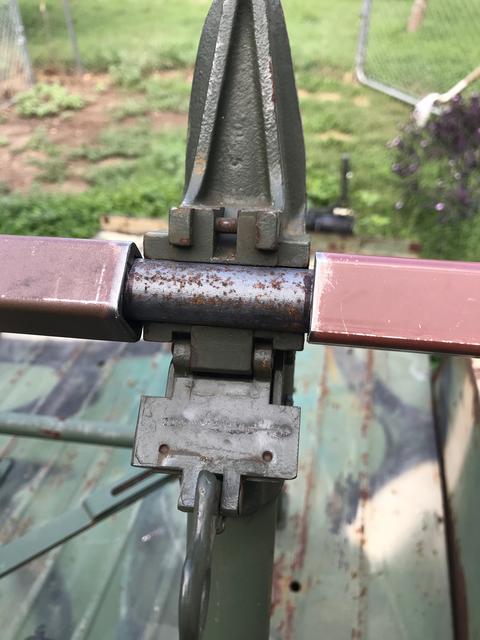
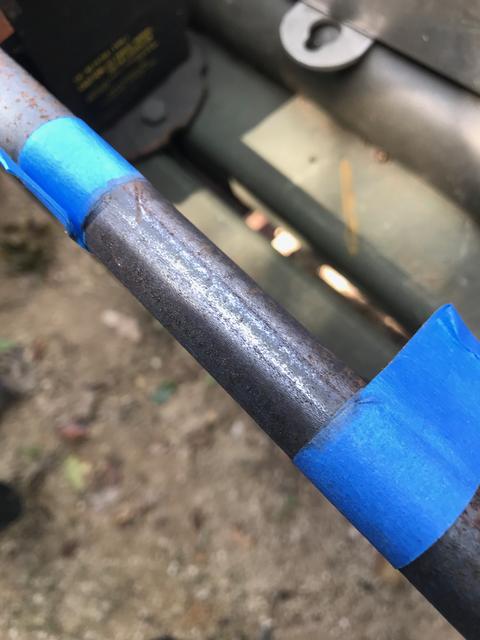
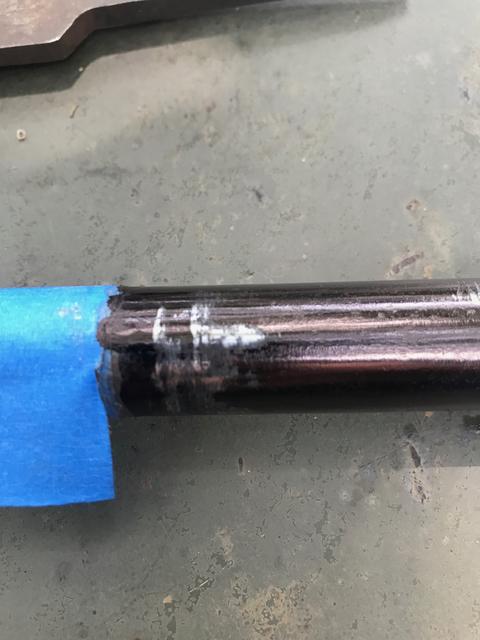
So, I've come to the matter of the 3/4" rod which is of structural steel so it is neither true, nor perfectly round. Again, I don't have a lathe but I'll forge ahead anyway. As it came from the metal supply place, it is close, but no cigar. It doesn't turn freely. So, I mark the edges of the areas that need to be improved with a permanent marker and then follow up with painter's tape.

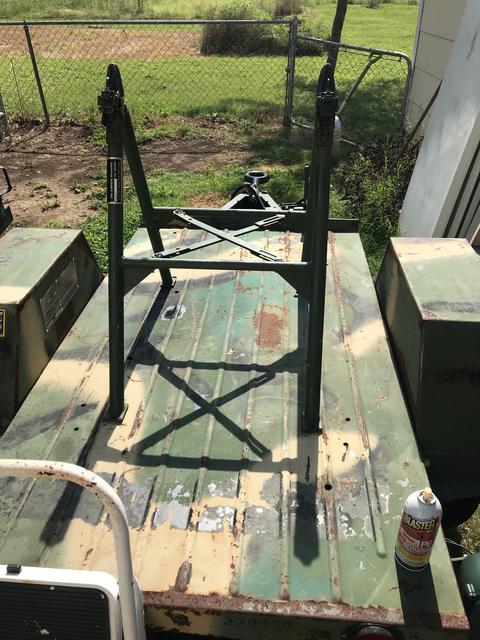
By the way, if you are wondering what the strange shaped dog-ear is at the top of the frame, this frame is designed so that it can be laid out flat so as to make it suitable for a two, or a four man carry. The dog ear bit makes that possible. The frame can also be folded up like a jack knife and used like a wheel-barrow (one man) with the spool acting as the wheel. Kinda cool, huh?

Image

Image

On my very first efforts I find obvious irregularities from the extrusion process.

Image

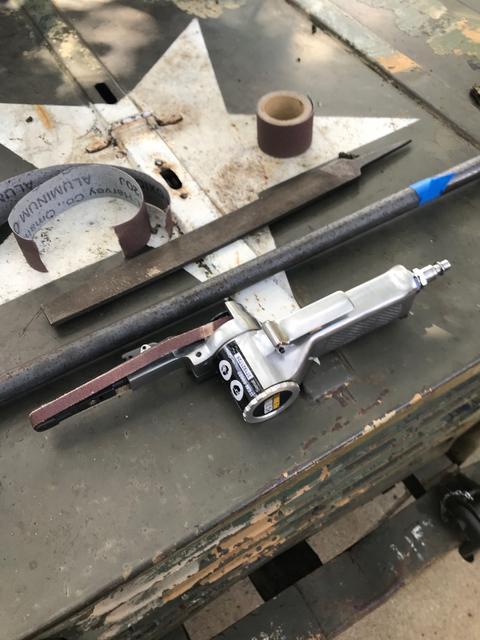
File? Nope. Crocus cloth? Too slow. I'd be at it all day. And then I remembered the little specialty tool from Harbor Freight. Perfect!

Image

Image

After working it down a bit and after many, many test fittings I coated the surface I was working with a broad tip permanent marker. After a few turns, the areas that were hanging up were readily apparent. I flipped the rod and ran it on both sides because it can go on either way and though they are very close, both ends of the frame are apparently not machined to exactly the same size.

Image

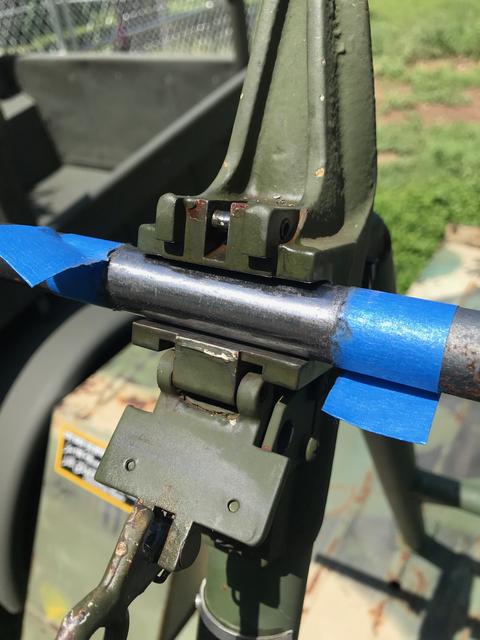
And so, I was able to focus my follow up passes where it counted the most. Because this rod is suspended between two points, every change I made affected the other end and believe me, getting this to run true without a lathe is an unnatural act.

Image

Image

Image

Eventually, I got the high points brought down and now, it rotates unhindered. My first thoughts were that I would love to have it properly turned down and maybe even some bushings set up for this but that would really be gilding the lily. The device never turns for any prolonged time or at a high speed, so my farm boy efforts should work out fine with a bit of quality lubricant. Again, this is never going to see the kind of use the military expected of it so, for now, this is quite satisfactory.

Image
Last edited by m3a1 on June 29th, 2019, 3:17 pm, edited 1 time in total.

Mark
Brigadier General
Brigadier General
Posts: 2091
Joined: September 19th, 2009, 11:33 pm
Location: South Dakota

Re: Give your rig a purpose

Unread post by Mark » June 29th, 2019, 2:06 am

Reminds me of a reel jack, in doing line work putting a reel of wire to string out the wire on it and sagging the wire
mark


1968 m274A5
1960 m151
1981 m151A2
1964 m416
1971 m416

Post Reply