We could make a full length with the same cut out as this one shown with welded in contours rather than being stamped. If people would be satisfied that it is not 100% original then I'd consider making them. For us to make tooling to copy the original would be big bucks and I don't think we'd sell enough to justify the investment.halftracknut wrote:Do you plan to make and sell full lenght floors?
My M 151 A1 Restoration Project
Moderators: rickf, raymond, Mr. Recovery
-
lpcoating
- Brigadier General

- Posts: 2030
- Joined: February 19th, 2013, 11:38 pm
- Location: Mansfield, PA
- Contact:
Re: My M 151 A1 Restoration Project
M151 Body Panels - http://www.m151bodypanels.com/
'68 A1 - Under full resto
'68 A1 - Under full resto


Re: My M 151 A1 Restoration Project
The passenger side should be easy since it is flat the whole way. That is the one that usually needs the whole thing.
1964 M151A1
1984 M1008
1967 M416
04/1952 M100
12/1952 M100- Departed
AN/TSQ-114A Trailblazer- Gone
1984 M1008
1967 M416
04/1952 M100
12/1952 M100- Departed
AN/TSQ-114A Trailblazer- Gone
-
halftracknut
- Brigadier General
- Posts: 2068
- Joined: December 11th, 2007, 2:28 pm
Re: My M 151 A1 Restoration Project
it's not flat....tool box and battery box are in it...
slowest mutt east of the missippi..
Re: My M 151 A1 Restoration Project
Forgot about the battery box recesses, I guess the tool box has the same profile as the gas tank well, just never paid attention to it since it was one spot I didn't have to work on with mine. OK HTN, You finally won one. 
1964 M151A1
1984 M1008
1967 M416
04/1952 M100
12/1952 M100- Departed
AN/TSQ-114A Trailblazer- Gone
1984 M1008
1967 M416
04/1952 M100
12/1952 M100- Departed
AN/TSQ-114A Trailblazer- Gone
Re: My M 151 A1 Restoration Project
Wow, I'm surprised. I would think there would be a large need for the complete floor. Every tub I ran across had most of the floor rusted away, at least to the point where it would be better to replace the panel rather than to try to weld up holes or partial panel replacement. I guess there are many that might not feel comfortable replacing a piece so large. That being said, is it safe to say the complete floor panel will NOT be produced? 
Re: My M 151 A1 Restoration Project
I can see Guy's point in what he say's about the cost of tooling. That cost would have to be passed on to the consumer. Would you be willing to pay hundreds of dollars for a panel? Or much less for several panels that can be welded together? I was the main proponent for the one piece panel but I now see the problems and costs involved. The front floors are available as are the battery box floors. What is now needed are the tool box and gas tank floors and both of those would need to be stamped, expensive tooling for dies.
1964 M151A1
1984 M1008
1967 M416
04/1952 M100
12/1952 M100- Departed
AN/TSQ-114A Trailblazer- Gone
1984 M1008
1967 M416
04/1952 M100
12/1952 M100- Departed
AN/TSQ-114A Trailblazer- Gone
-
lpcoating
- Brigadier General
- Posts: 2030
- Joined: February 19th, 2013, 11:38 pm
- Location: Mansfield, PA
- Contact:
Re: My M 151 A1 Restoration Project
I could make the full floor but the back parts would be welded pieces, not a stamping. That's an option...
M151 Body Panels - http://www.m151bodypanels.com/
'68 A1 - Under full resto
'68 A1 - Under full resto
-
lpcoating
- Brigadier General
- Posts: 2030
- Joined: February 19th, 2013, 11:38 pm
- Location: Mansfield, PA
- Contact:
Re: My M 151 A1 Restoration Project
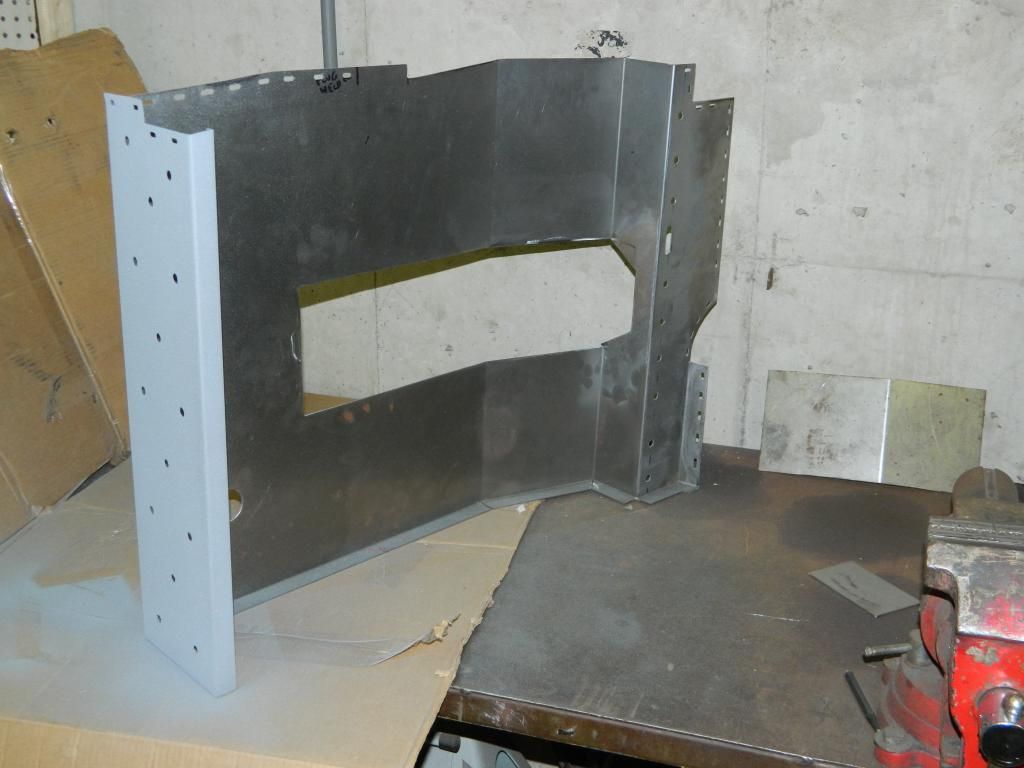
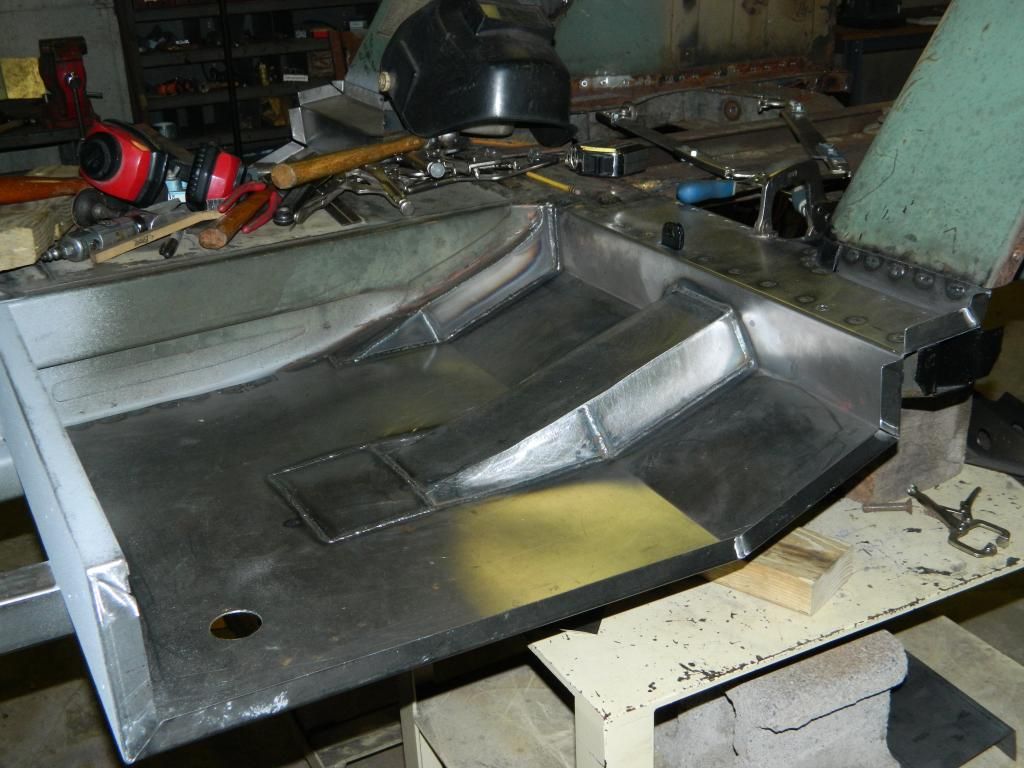
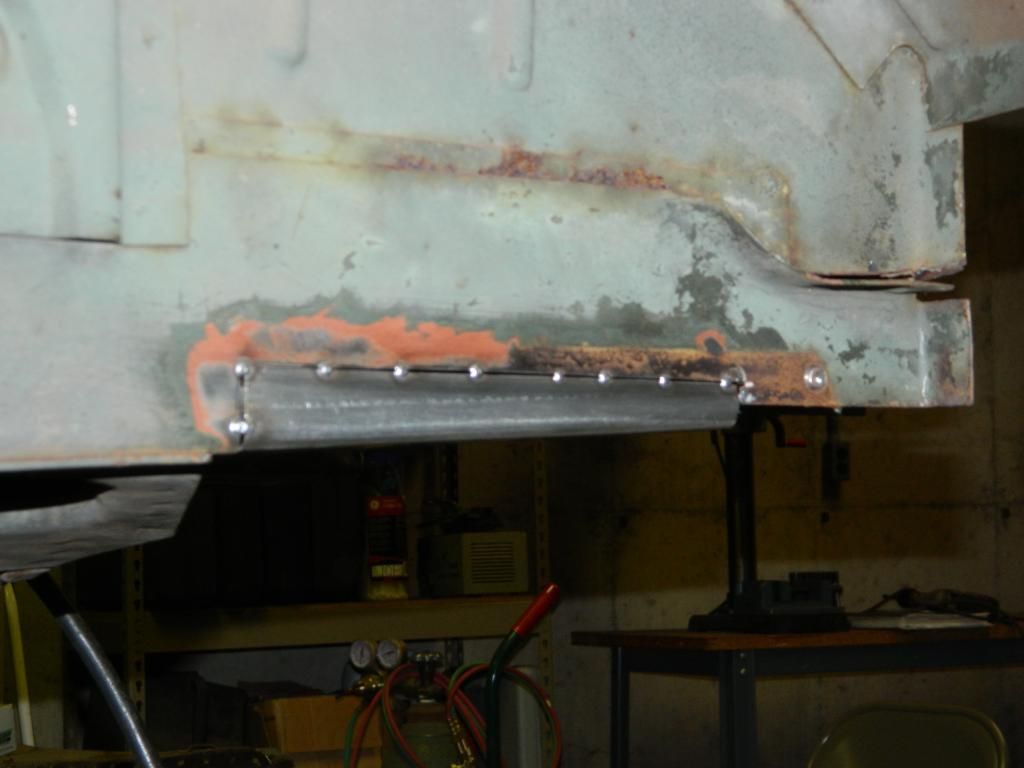
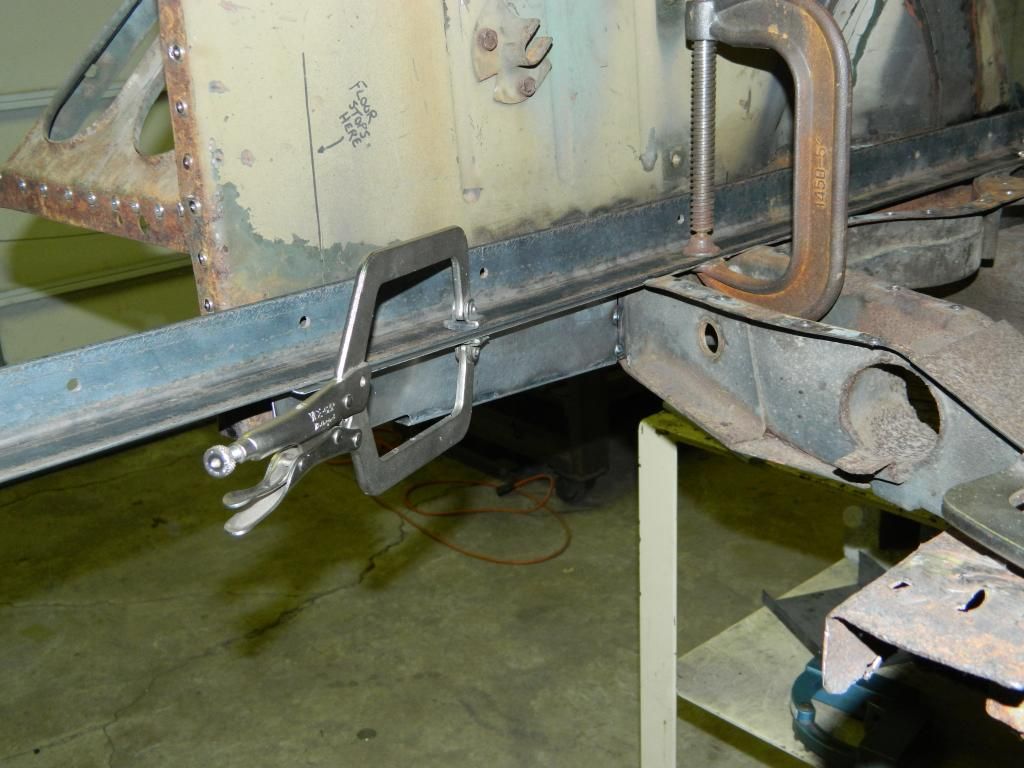
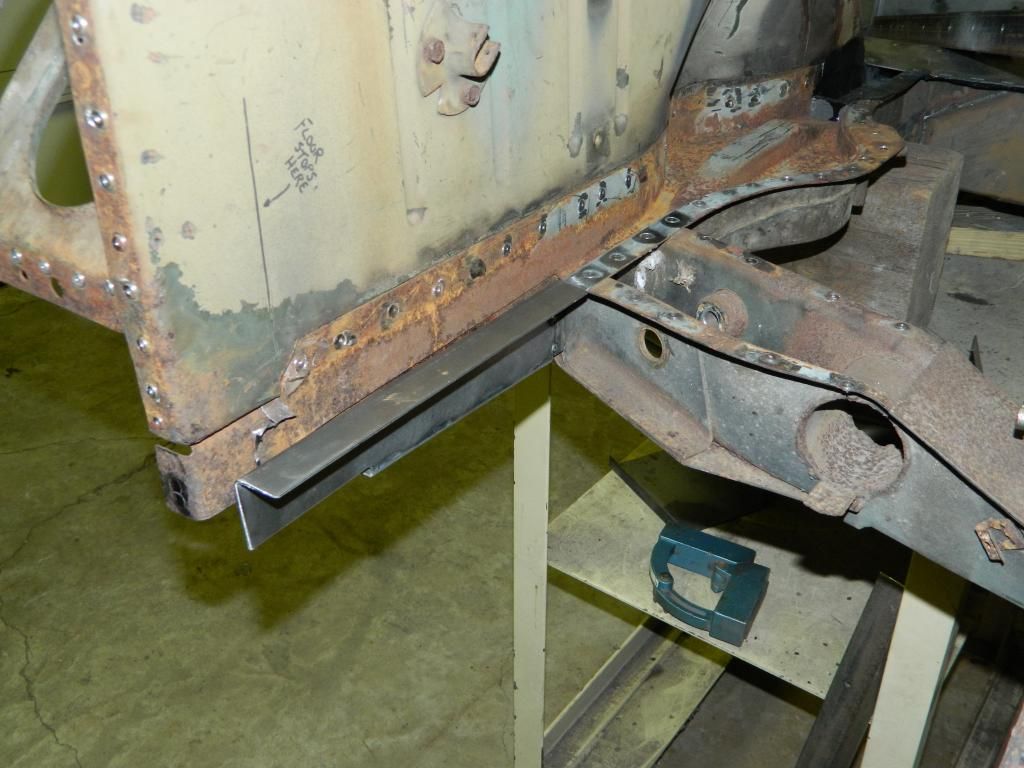
Gas tank floor area is now ready to go in. I used weldable primer on the front frame rails and POR on the inside of the cross member and top area. I'll scrape off the POR in the areas that require plug welding. Once the floor is tacked in I'll work on the fill pieces and then it's on to the rear.
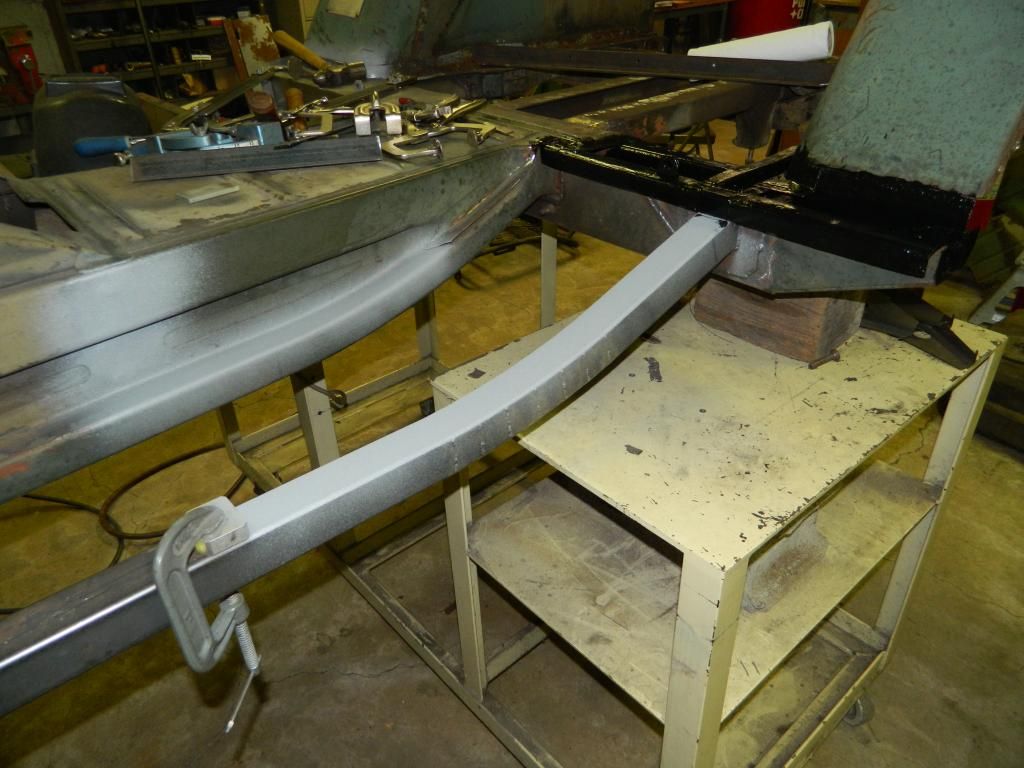

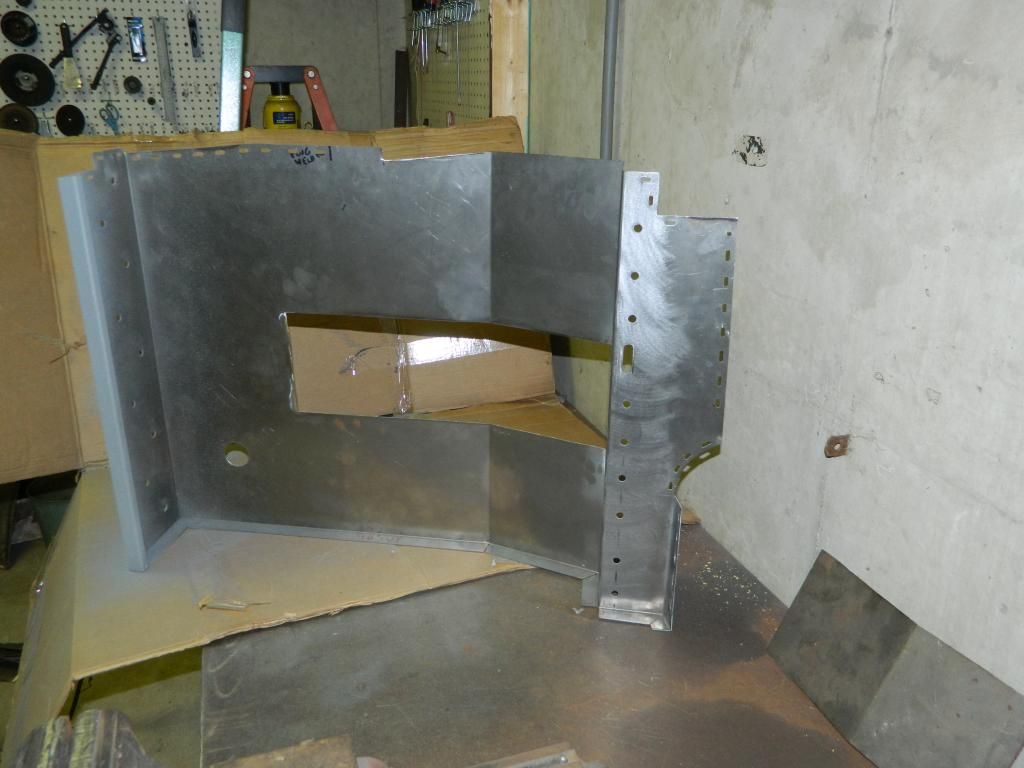
Floor pan is also sprayed with weldable primer and is slotted / drilled for plug welding. I made this pan the same as the other side. The front floor will lay over top of the upright for the seat support.
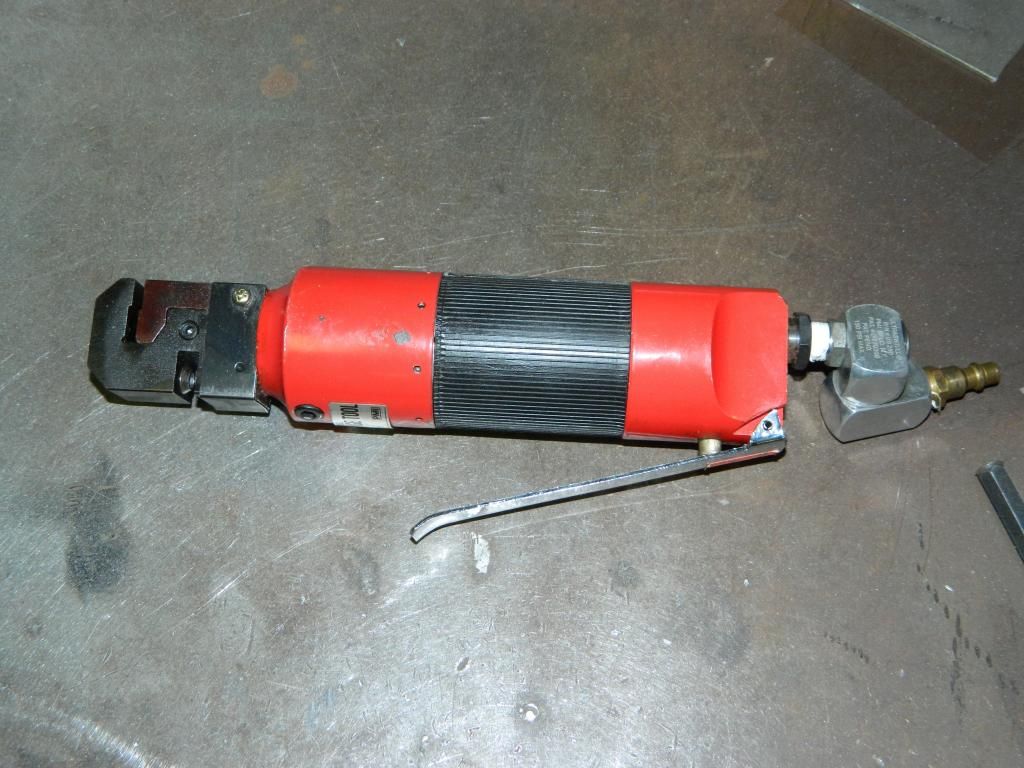
This is on loan from a friend. It's a crimp / hole punch. Does a nice job of making the slots for plug welding. Quick and clean!


Floor pan is also sprayed with weldable primer and is slotted / drilled for plug welding. I made this pan the same as the other side. The front floor will lay over top of the upright for the seat support.


This is on loan from a friend. It's a crimp / hole punch. Does a nice job of making the slots for plug welding. Quick and clean!

M151 Body Panels - http://www.m151bodypanels.com/
'68 A1 - Under full resto
'68 A1 - Under full resto
-
lpcoating
- Brigadier General
- Posts: 2030
- Joined: February 19th, 2013, 11:38 pm
- Location: Mansfield, PA
- Contact:
Re: My M 151 A1 Restoration Project
Started plug welding the floor in tonight. I'll make the fill pieces next and then move to the rear and work on the tail end of the frame rails, POR the inside of the rails and then lay down the rear floor.


M151 Body Panels - http://www.m151bodypanels.com/
'68 A1 - Under full resto
'68 A1 - Under full resto
Re: My M 151 A1 Restoration Project
Getting there, I have to laugh, you bought this thing with no idea what to do or where to get parts and now we have a major supplier of body parts in your company and YOU are still not done with your own vehicle.
1964 M151A1
1984 M1008
1967 M416
04/1952 M100
12/1952 M100- Departed
AN/TSQ-114A Trailblazer- Gone
1984 M1008
1967 M416
04/1952 M100
12/1952 M100- Departed
AN/TSQ-114A Trailblazer- Gone
-
lpcoating
- Brigadier General
- Posts: 2030
- Joined: February 19th, 2013, 11:38 pm
- Location: Mansfield, PA
- Contact:
Re: My M 151 A1 Restoration Project
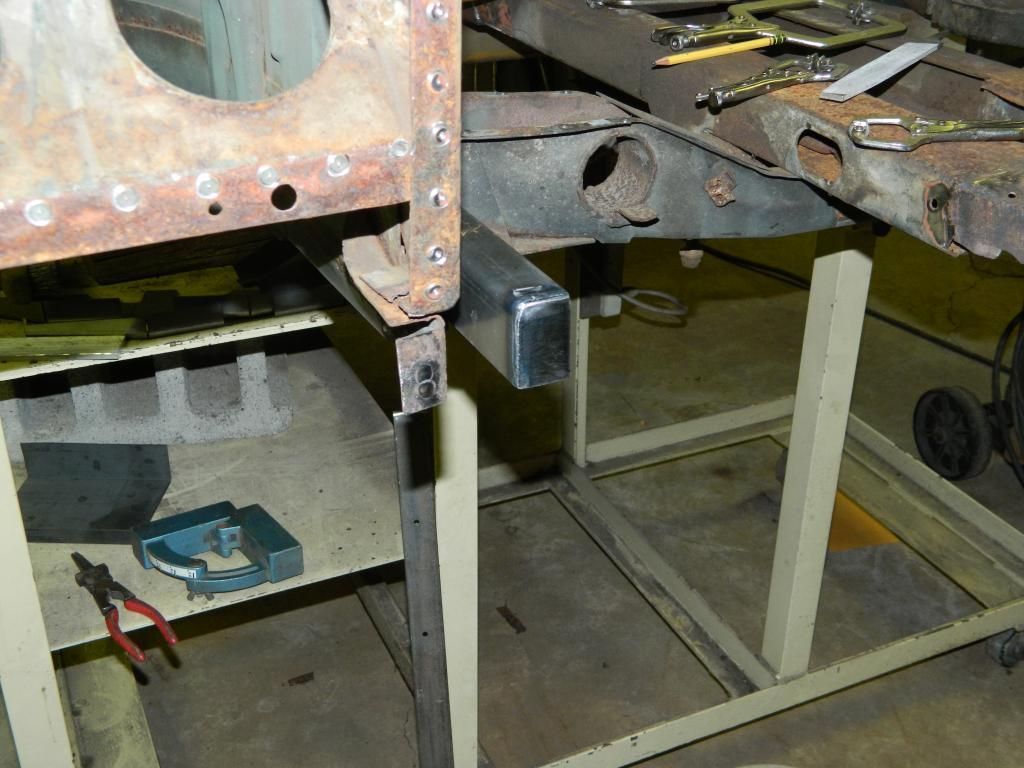
Gas tank floor area is pretty much done. Have to do a little clean up and weld from the bottom side but won't worry about that until it's back on the rotisserie.

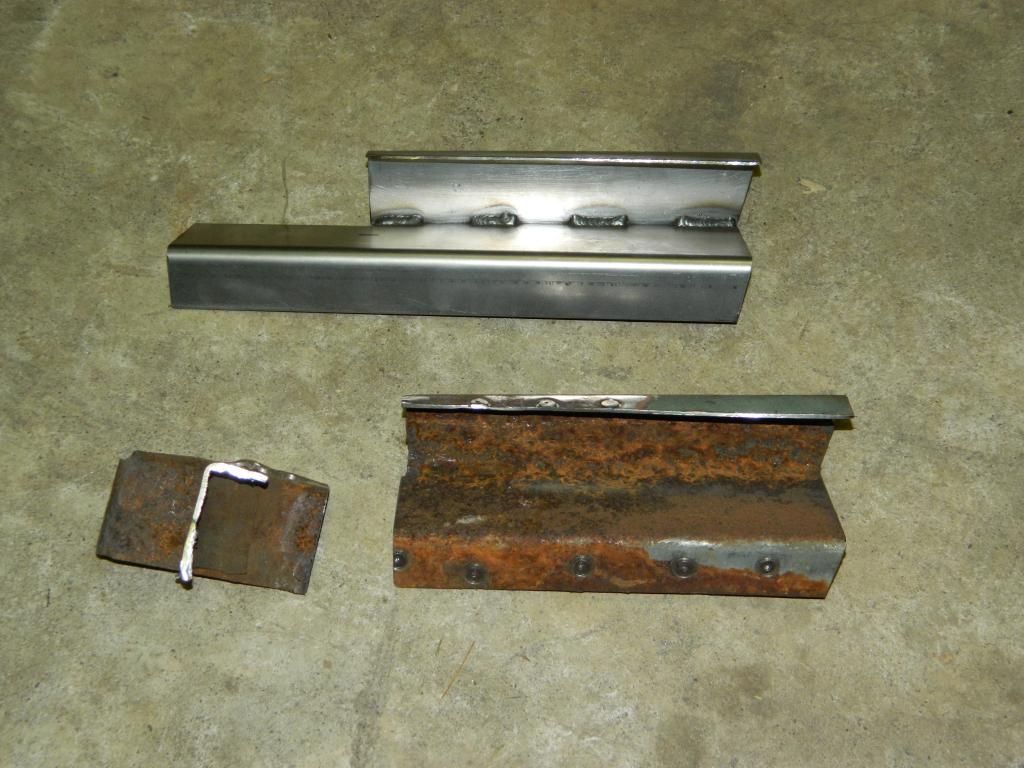
Moved to the rear tonight. The rear driver side frame was rusted pretty bad so I decided to cut some of it out and will replace. It's also a little rough up under the cross member and spring mount but nothing I'm going to mess with. The passenger side was not as bad so I'll only replace the end.
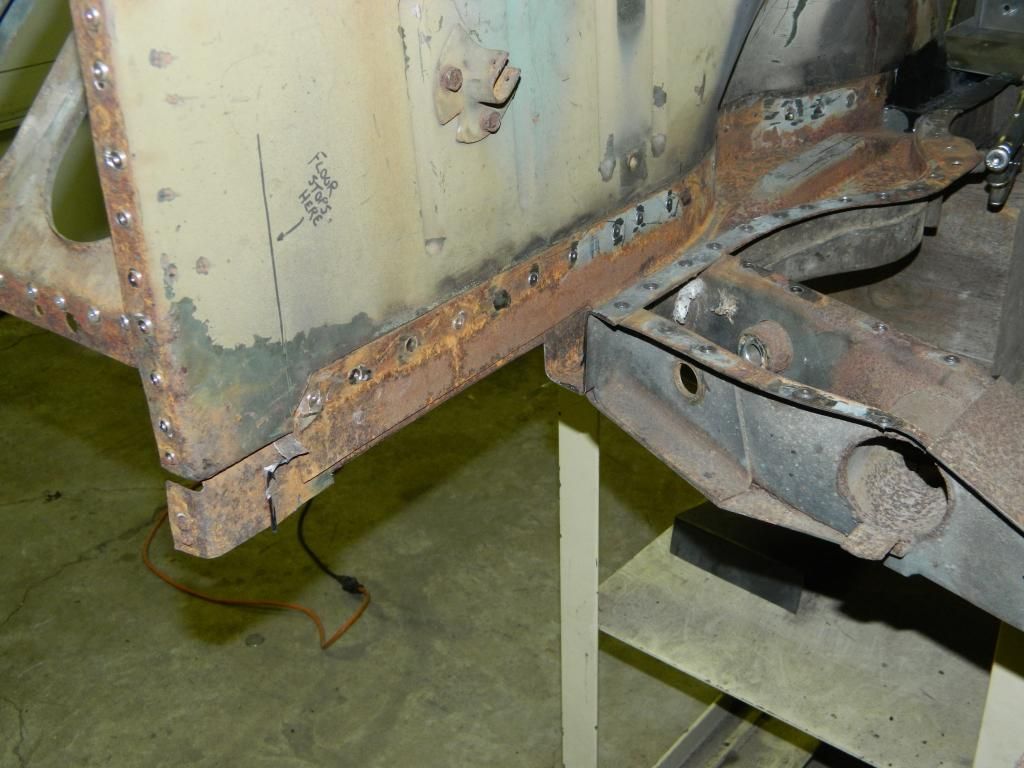
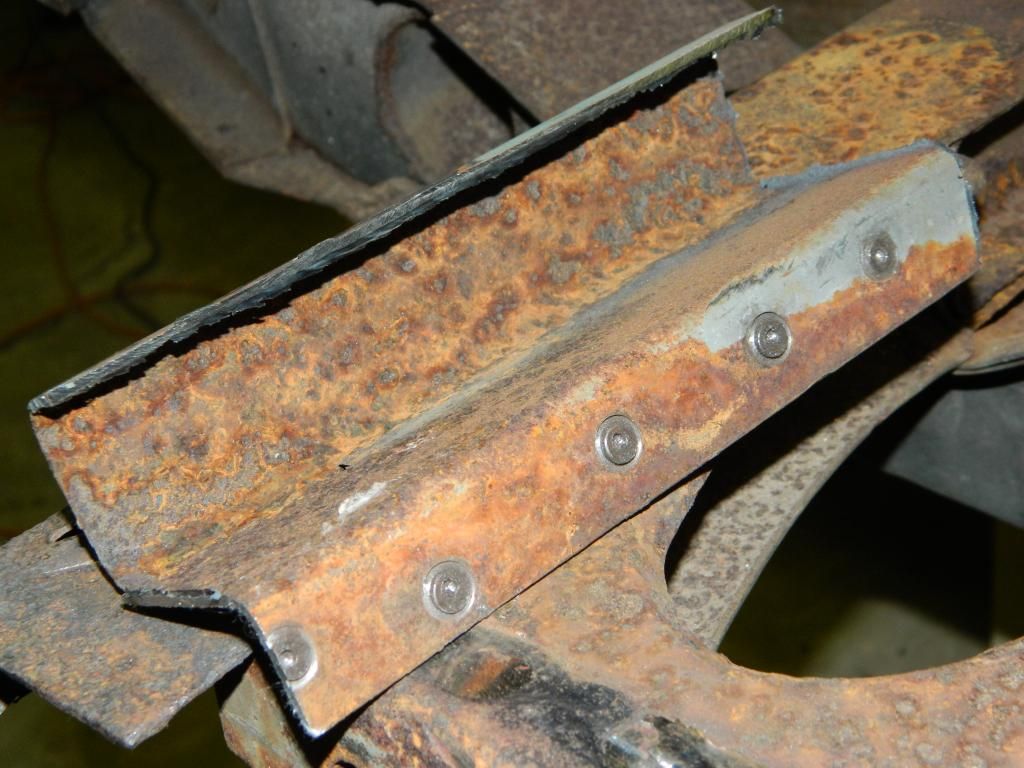
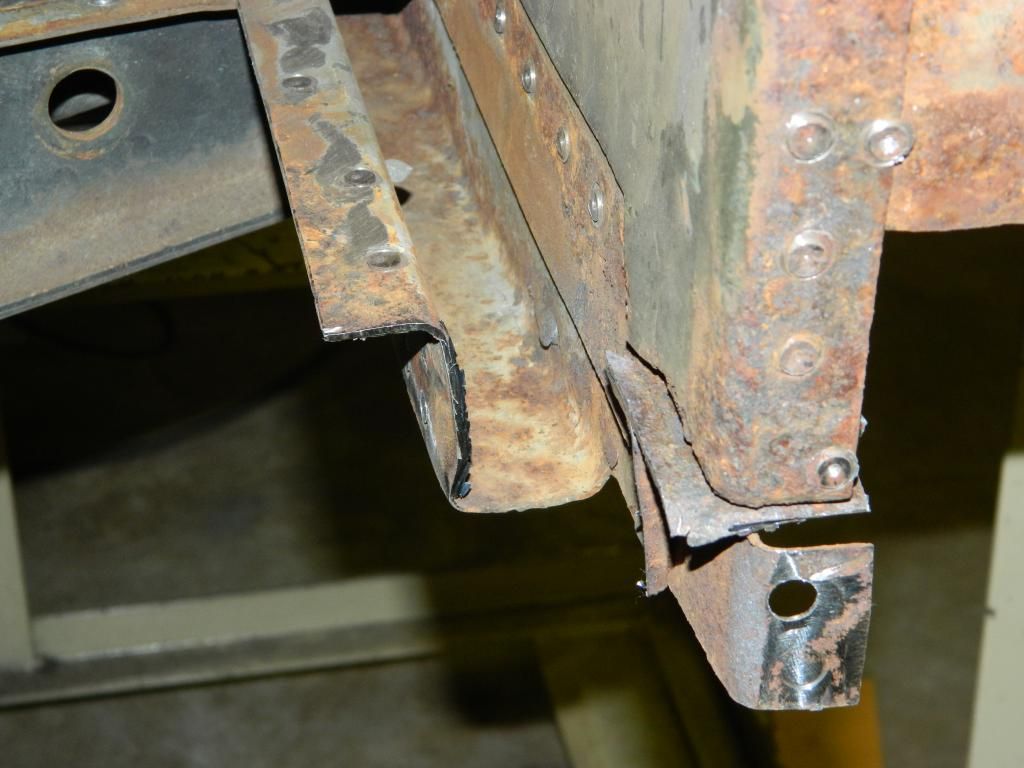
At some point soon I'll be adding more metal than I'm cutting off...


Moved to the rear tonight. The rear driver side frame was rusted pretty bad so I decided to cut some of it out and will replace. It's also a little rough up under the cross member and spring mount but nothing I'm going to mess with. The passenger side was not as bad so I'll only replace the end.


At some point soon I'll be adding more metal than I'm cutting off...
M151 Body Panels - http://www.m151bodypanels.com/
'68 A1 - Under full resto
'68 A1 - Under full resto
Re: My M 151 A1 Restoration Project
You are WAY past that point just in the floors. I keep looking at this thread and I am going to put the rust bucket on the rotisserie.
1964 M151A1
1984 M1008
1967 M416
04/1952 M100
12/1952 M100- Departed
AN/TSQ-114A Trailblazer- Gone
1984 M1008
1967 M416
04/1952 M100
12/1952 M100- Departed
AN/TSQ-114A Trailblazer- Gone
-
Legio3Arty
- Corporal

- Posts: 42
- Joined: May 22nd, 2014, 2:43 am
- Location: Dudley, Massachusetts
Re: My M 151 A1 Restoration Project
Following this thread gives me confidence that my son and I will be able to rescue our A1. We just started the tear-down tonight and already he's learning about smashed knuckles, broken bolts, and intersting ways to combine cuss words. As we dig down to the bones of the thing the rust and the ugliness are easier to see. My son was shocked when I punched a screwdriver through the bondo that was all that remains of the fender top near the black-out light bracket. Luckily, it's just the flat sheet metal that's gone and there's plenty of good metal all around the lip and radius to weld back to. I knew that when I bought it along with the usual rot on the underside. On a good note, the back half is better than I'd anticipated. the only scary part from the seats back is the transom, but it's all localized where the replacement panel from the body kit will fill in. As I'm looking at nearly 50 years of dings and wear and the restorer part of my brain is thinking about how I'm going to smooth them all out, I've got my boy to remind me "Dad, we're not building a showcar. It's a combat vehicle! Don't get all crazy and take all the character out of it." 
1967 M151A1
1967 M416 trailer
100AD Roman Mule Cart
1st ID Desert Storm Humvee Scout
M48/M60/M1 series Tanker, Armorer, Ground Surveilance Systems Operator,
Biomedical Equipment Technician
1967 M416 trailer
100AD Roman Mule Cart
1st ID Desert Storm Humvee Scout
M48/M60/M1 series Tanker, Armorer, Ground Surveilance Systems Operator,
Biomedical Equipment Technician
Re: My M 151 A1 Restoration Project
I love it! I am just like you, I have to have bodywork perfect or it drives me nuts. It is hard working on something like this after years of doing cars the perfect way.
1964 M151A1
1984 M1008
1967 M416
04/1952 M100
12/1952 M100- Departed
AN/TSQ-114A Trailblazer- Gone
1984 M1008
1967 M416
04/1952 M100
12/1952 M100- Departed
AN/TSQ-114A Trailblazer- Gone
-
lpcoating
- Brigadier General
- Posts: 2030
- Joined: February 19th, 2013, 11:38 pm
- Location: Mansfield, PA
- Contact:
Re: My M 151 A1 Restoration Project
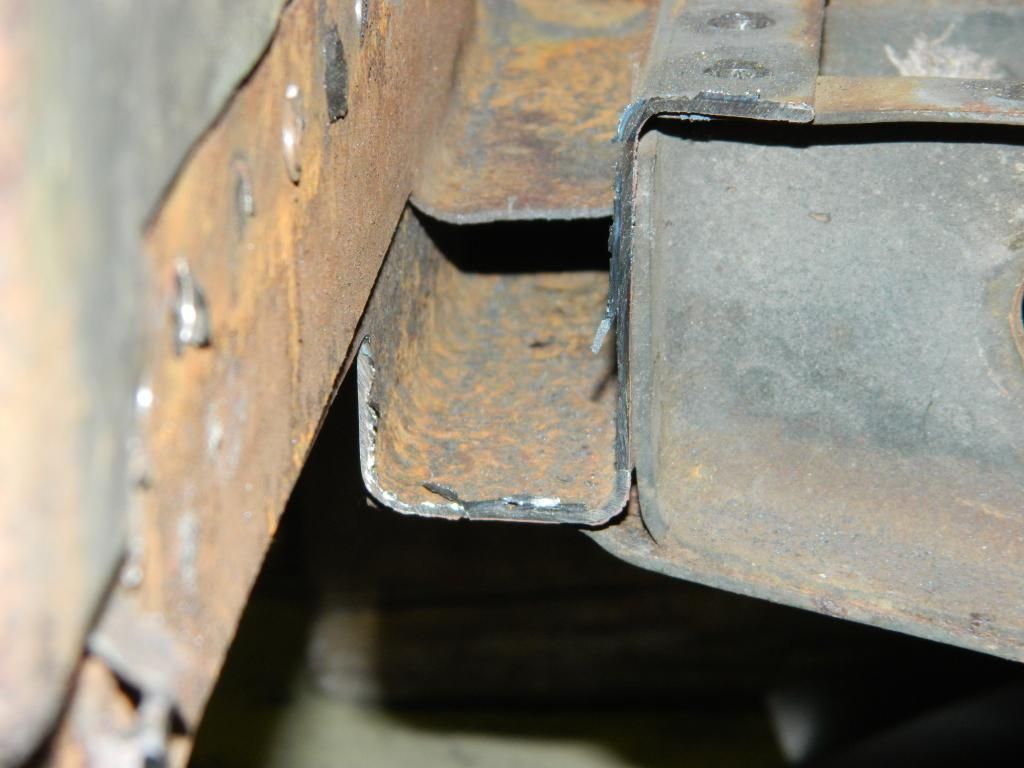
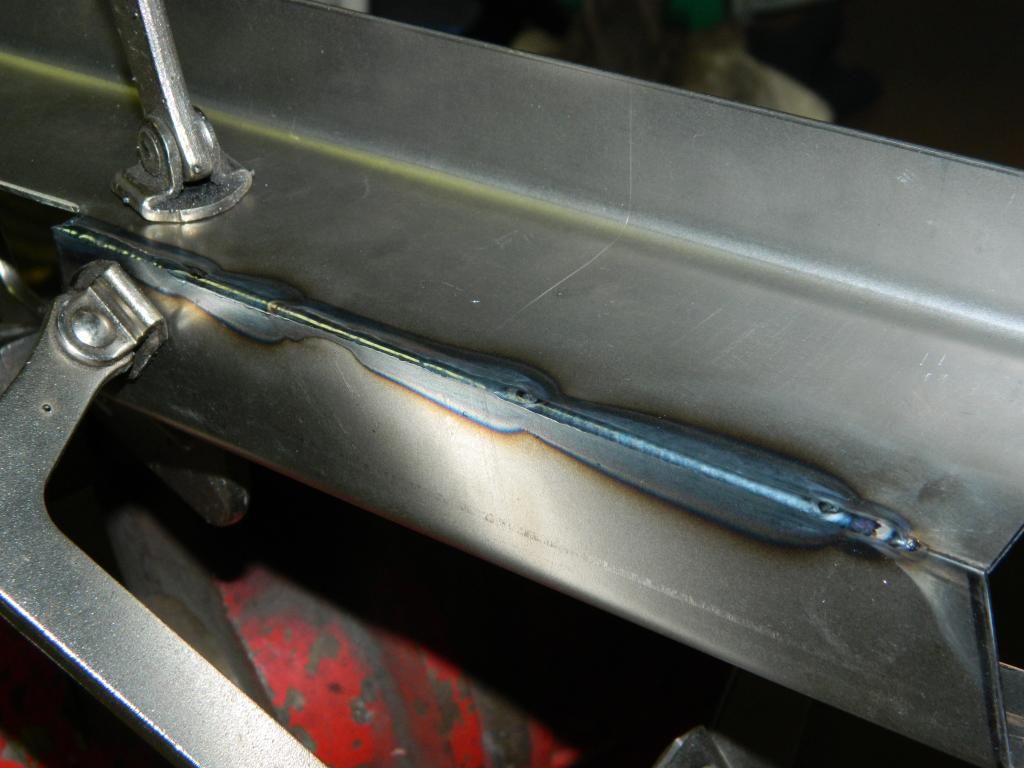
Tack welded the driver side frame rail section in today. At first I did not realize that the rear section behind the spring pocket has a taper. I made this out of 2 pieces and just cut the angle by hand and welded together. I TIG welded the outside seam first and then used the MIG to stitch weld the inside.


M151 Body Panels - http://www.m151bodypanels.com/
'68 A1 - Under full resto
'68 A1 - Under full resto